Wednesday, December 29, 2010

Happy Holidays!!!

Hello all! I apologize if it seems that I have been neglecting you and my dedication to sweets. 
Not to worry though.. I have just been busy traveling home to visit family and friends, to celebrate, bake, and eat!! Which I am sure all of you are doing as well!
Anyway I just thought I would drop you a note, to say hello! I hope everyone is having a happy and safe holiday season.
Here is a sneak peak of what recipes to expect...next year!
Happy New Year and cheers!


cookies:


Cake:


TINA's cookie balls

and cupcakes oh my!

Monday, December 13, 2010

National Cupcake Day 12/15: Gingerbread Cupcakes

Since national cupcake day is smack dab in the middle of the holidays..what a better flavor cupcake to have than gingerbread?
This is a classic recipe gone cupcake!
I used my great grandmother’s gingerbread recipe to make these cupcakes.
The cupcakes turned out just fine..however the gingerbread did not taste how I made it the last time for a dinner party..which was exquisite!
Maybe this recipe is not meant to be doubled (which I did in order to make 24 cupcakes) or perhaps I tampered with it a bit!
Bad Marge! Bad! The recipe requires 2 cups flour..but since I doubled the recipe, I thought I’d experiment by incorporating 3 cups regular flour, 1 cup cake flour.
I believe the cake flour had a lot to do with the bread tasting a bit different…and a bit dense.
Other than the taste being a bit off than I remembered..they were great!
There are tons of gingerbread cupcake recipes out there..but for this special occasion I wanted to use a family recipe!
I absolutely recommend baking this gingerbread for the holidays. (don’t steer away from the recipe like I did for cupcakes) Use the exact amount of ingredients as directed!
My Aunt Kathleen would make this cake, cut it while it was still hot, split the piece and butter it. Yum!
I like my mother's description of her grandmothers gingerbread: "It's a cozy dessert!"
This bread is also yummy with whipped cream, a lemon sauce, or ice cream; also another great breakfast substitute!
Ingredients:
1 Tbl butter
1 cup sugar
1/2 cup molasses (Grandma's unsulphured)
2 eggs
2 tsp ginger
2 tsp cinnamon
1 tsp vanilla
2 cups flour
1 cup boiling water with 1 tsp baking soda dissolved in it
Preheat oven to 350. Mix all ingredients together at once except the water. Make sure the baking soda has dissolved in the water and add. Mix well. Pour into 9x13 greased and floured pan. Bake for about 20 minutes, or until a tester comes out clean. Serve immediately or let cool.
For the butter glaze icing I used for the cupcakes visit this Martha Stewart link!

Tuesday, December 7, 2010

LIGHT!!! Marbled Chocolate Banana Bread

Here is an option to start off the holiday on a healthy note!
Don’t let the whole wheat flour, fat-free yogurt, and egg substitute trick you.
This bread is moist, dense, and sweet enough to feel like a real indulgence. And don’t we all need that?

I am a nut lover so I did miss the crunch of walnuts as I bit into the bread; but if you are not a nut lover this is a perfect treat for you!

Marbled-Chocolate Banana Bread
1 cup all-purpose flour
1 cup whole wheat pastry flour (or all-purpose flour)
3/4 tsp baking soda
1/2 tsp salt
1/8 tsp ground nutmeg
3 oz. bittersweet or semisweet chocolate, chopped
1 cup sugar
1/4 cup unsalted butter, softened
1 1/2 cups mashed banana (about 3)
1/2 cup egg substitute
1/3 cup plain fat-free yogurt

1. Preheat oven to 350F. In a medium bowl whisk the flours, baking soda, salt and nutmeg until blended.
2. Place the chocolate in a medium microwave-safe bowl, and microwave on HIGH 1 minute or until almost melted, stirring until smooth. Cool slightly.
3. Place the sugar and butter in a large bowl; beat with a mixer at medium speed until well blended (about 1 minute.) Add banana and egg substitute, and yogurt, beating until blended. Add the flour mixture with a wooden spoon, stirring just until blended.
4. Add 1 cup batter to chocolate, stirring until well combined. Spoon chocolate batter alternately with plain batter into an 8 1/2 by 4 1/2 inch loaf pan coated with nonstick cooking spray. Swirl batters together using a knife.
5. Bake 40 minutes to an 1 hour or until wooden pick inserted in center comes out clean. Cool 10 minutes in pan on a wire rack; remove from pan. Cool completely on wire rack. Makes 1 loaf, 16 slices.

And because this is a “light” version of banana bread, here's the nutritional info:
Per 1 slice - Calories 185; Fat 5.4g; Protein 3.4g; Cholesterol 8.2mg; Carbohydrate 32g


Recipe from Enlightened Chocolate by Camilla Saulsbury

Sunday, November 28, 2010

Sugar Turkey & Pumpkin shaped Cookies


Happy Thanksgiving everyone!
I was assigned the task of baking dessert for the kids this Thanksgiving dinner!…preferably something handheld! Therefore my options were brownies, cupcakes or cookies.
Everyone loves cupcakes, but since pies and cakes would also be served as dessert, I thought I should opt for something a bit lighter and not as messy.
Brownies are good, but you cannot get too creative with them.
Instead I opted to make sugar cookies from scratch, and use the super cute turkey and pumpkin shaped cookie cutters I just bought.

Sugar Cookies
1 1/2 cups butter, softened
2 cups sugar
4 eggs
1 tsp vanilla extract
5 cups all-purpose flour
2 tsp baking powder
1 tsp salt

1. In a large bowl cream together butter and sugar until smooth. Beat in eggs and vanilla. Stir in the flour, baking powder, and salt. Cover; chill dough at least 1 hour, or overnight.
2. Preheat oven to 400. Roll out dough on floured surface to 1/4 to 1/2 inch thickness. Cut into shapes with cookie cutter. Place 1 inch apart on ungreased cookie sheets.
3. Bake 6 to 8 minutes in preheated oven. Cool completely before icing. Makes 4 to 5 dozen cookies.


Sunday, November 21, 2010

Baked Pumpkin Spice Donut Holes


Another pumpkin recipe! I am quite obsessed with pumpkin this season!
This would be the perfect thing to have for breakfast Thanksgiving morning. A few of these and a side of scrambled eggs..MMMM ..MMMMMM! 


I don’t have much to say about these little guys, except that they are incredibly addicting! 
Small, light and fluffy! I will be baking these often! Gobble! Gobble!

 Adapted from Baking with Ramen
  Makes 20-24 mini muffins

*** Don’t worry – you don’t actually use the whole stick of butter for the coating, it just makes it easier to dip the muffins. If you’re looking for a somewhat lighter treat, skip the coating – the muffins are good on their own too! These are best dipped and coated the same day you are going to eat them; otherwise the coating will get a bit soggy.

Ingredients:

For Donuts
1 3/4 cups all-purpose flour
2 teaspoons baking powder
1/2 teaspoon salt
1/2 teaspoons cinnamon
1/2 teaspoons nutmeg
1/2 teaspoon allspice
1/8 teaspoons ground cloves (I left these out)
1/3 cup vegetable oil
1/2 cup brown sugar
1 egg
1 teaspoon vanilla extract
3/4 cup canned plain pumpkin (not pumpkin pie filling)
1/2 cup low-fat milk


For Coating
1 stick of unsalted butter, melted
2/3 cup granulated sugar
(or use Splenda, to keep them on the lighter side!)
2 tablespoons cinnamon


Directions:
Preheat oven 350°F. Spray each cup in a 12-24-cup mini muffin tin with baking spray or butter generously.
In a medium bowl, whisk together flour, baking powder, salt and spices (through cloves). In separate, large bowl whisk together oil, brown sugar, egg, vanilla, pumpkin and milk until smooth. Add dry ingredients to wet ingredients and mix until just combined – do not over mix!
Divide batter evenly among muffin cups. Bake at 350°F for 10-12 minutes or until a toothpick comes out clean.
While the muffins bake, melt butter in one bowl and combine granulated sugar and cinnamon in another bowl. Remove muffins from oven and cool for 2 minutes, or until just cool enough to handle. Dip each muffin in melted butter, and then roll in cinnamon sugar to coat.


Thursday, November 18, 2010

Mocha Walnut Coffee Cake Bars

Quick, easy, and satisfies your morning craving for that large Starbucks muffin, bread, or donut!
I know ...you are reading the ingredients, and thinking…wouldn’t these be just as bad as having one of those items from Starbucks?

Well not necessarily! These are cut up into little squares to help with portion control…and you made them yourself! Therefore you know what you are putting into your body ; )
These were created by a contestant for Starbucks Natural Fusions giveaway contest.
I conveniently had the vanilla fusion coffee sitting in my fridge, so I replaced the cinnamon fusion used in this recipe with vanilla.
If you make these and they don’t disappear by lunch time, I recommend them as a small sweet treat to satisfy your after lunch or dinner sweet tooth craving.
There were only about 3 of these left within the first 5 minutes of me placing them in the kitchen of my office!
Don’t be shy and leave out any element of goodness when making these bars. The cake is pretty basic and it relies on all the textures and flavors from the add-ins. The confection sugar drizzle is a nice touch too, and always a favorite component of mine!

Mocha Walnut Vanilla Coffee Cake Bars
1 ½ cups chopped walnuts
1 2/3 cup (6 oz) all purpose flour
1 teaspoon baking powder
1/4 teaspoon baking soda
1/4 teaspoon salt
1 tablespoon ground cinnamon
4 tablespoons butter
1 cup packed light brown sugar
1 large egg
1/2 cup cooled strong coffee (I used Starbucks Natural Fusions Vanilla)
1/2 cup raisins
1/2 cup semi-sweet chocolate chips
1/4 confectioners sugar


Preheat oven to 350 degrees.
Thoroughly grease a 13×9 inch metal pan or line it with foil and spray foil with cooking spray.
Mix together the flour, baking powder, baking soda, salt and cinnamon. Set aside.
In a mixing bowl, using an electric mixer, cream the butter and brown sugar until light. Add the egg and beat for another minute. Add the flour mixture and coffee alternately. Stir in 1 cup of the walnuts and the full 1/2 cup raisins. Spread the batter in the baking pan going to the edges. Sprinkle remaining walnuts and chocolate chips across top.
Bake on center rack for 20 minutes. Remove from oven and let cool. With an electric mixer beat powdered sugar, with a few tablespoons of water, and 2 teaspoons of vanilla extract. Once you have reached your desired consistency, drizzle over top bars.
Lift from pan, set on a cutting board and score into bars. Makes about 30.


Monday, November 15, 2010

Maple-Gingerbread Layer Cake with Salted Maple Caramel Sauce


A few weekends ago I was invited over to my friend Alex and Laura’s house for a dinner party with a sommelier from the Beverly Hills restaurant CUT.
Two other couples were invited, so we decided to each bring a food course. My food course..of course..was dessert!
For such a sophisticated occasion I wanted to bake a sophisticated dessert. Little did I know what I got myself into...
I found this recipe in Bon Appétit’s October 2010 issue. The photo of the cake looked gorgeous! The ingredients and directions seemed fairly simple as well…
Well did any of you know maple sugar is the hardest ingredient to find..and most people order this sugar online!?
Luckily LA is full of large chain and small boutique grocery stores. After searching Gelson’s, Ralph’s, Trader Joes, Whole Food’s and Bristol Farms I finally found this special ingredient at Vicente Foods!

This bottle of sugar should have been placed with all the spices…because it only came in that size/amount! $18.00 for 1 cup of freaking maple sugar!
I caved in and purchased only one of these..choosing to save it for the frosting, rather than the cake. I decided to take my chances on making maple sugar on my own!
Crystallized ginger is also another tough ingredient to find out here…luckily Vicente Foods had this one as well!

After I got over the fact that I would not have the exact ingredients as directed, I began to chill out and bake.
Since I didn’t have maple sugar for the cake I added maple syrup and a bit of brown sugar and extra regular sugar to the batter.
I tasted the batter with a spoon..and it actually tasted quite pleasant!

As the cake was cooling I made the frosting. Once the cake had cooled completely, I frosted the cake as directed by Bon Appétit.
I frosted the bottom layer, then made the caramel sauce…(as directed by bon appétit), then drizzled caramel sauce on top of the bottom layer.
I then placed the second half of the cake on top, frosted the top and sides of the cake. Next I added the pecans on the side of the cake-also as suggested by Bon Appétit-and then “attempted” to drizzle the caramel sauce on top  to complete the cake…as directed  by the infamous Bon Appétit.
Well that was a horrible suggestion!

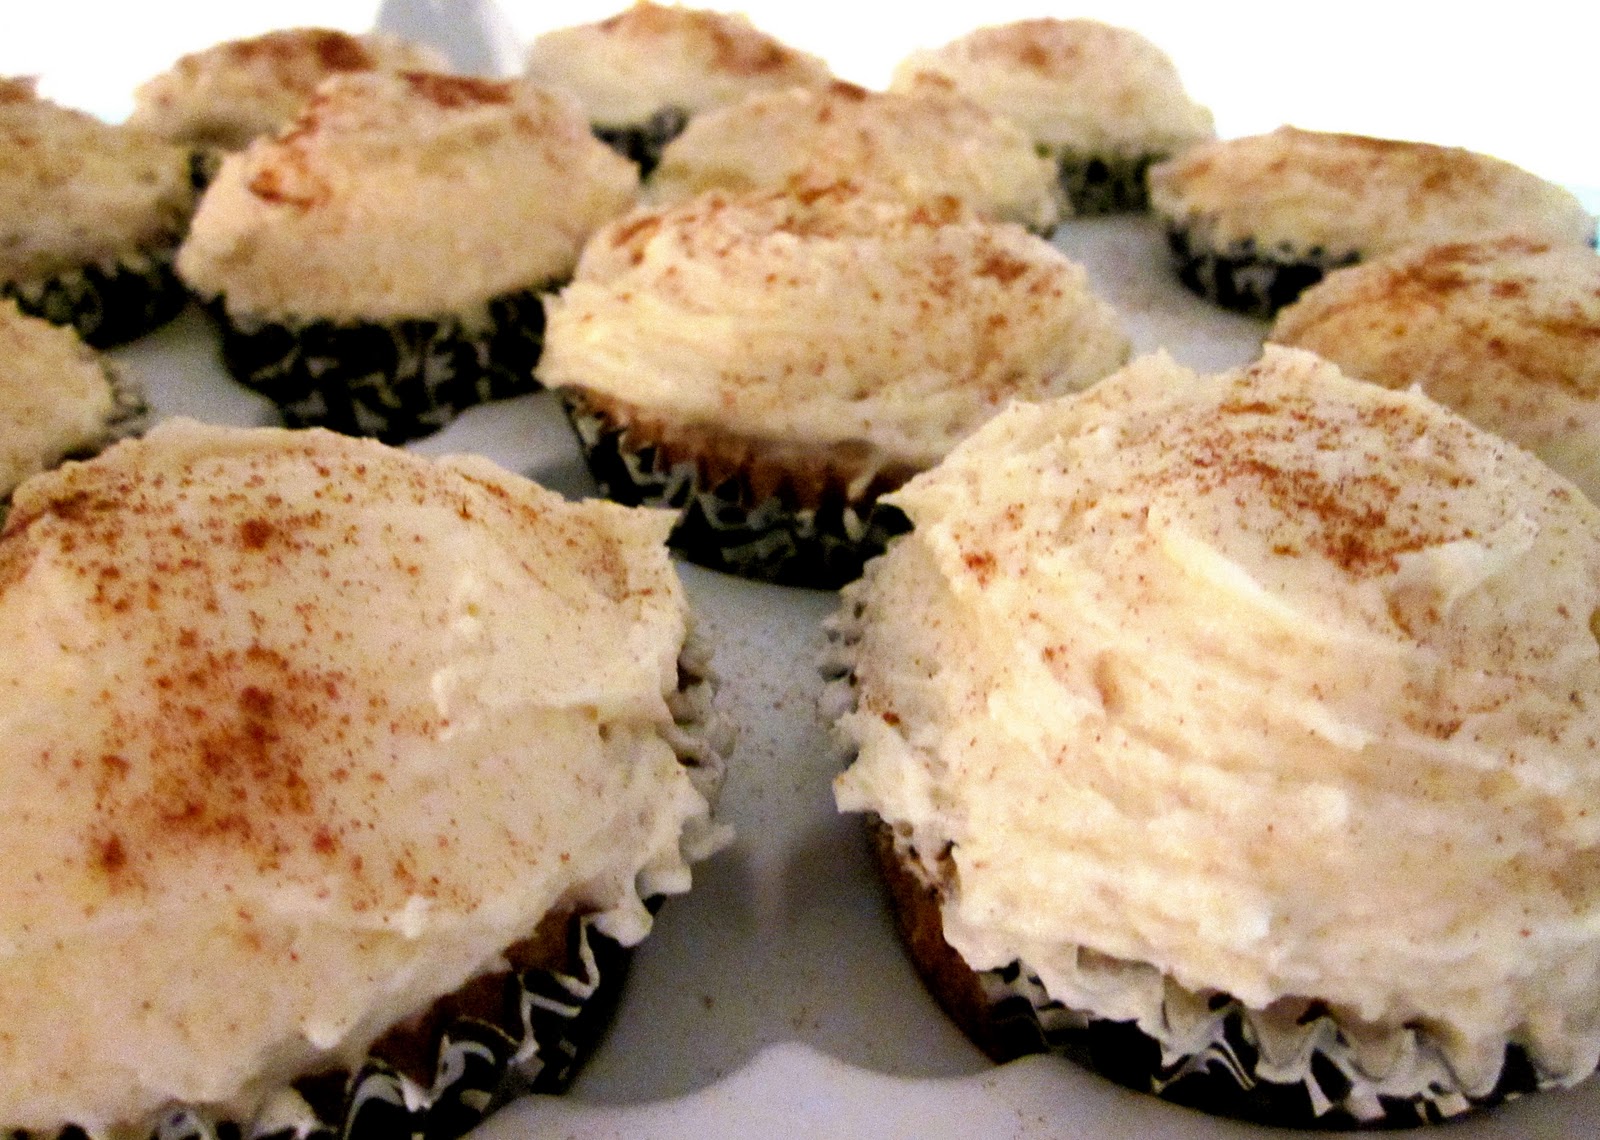
The cake looked beautiful, and then as I added the second layer of caramel drizzle as directed..it was clumpy, and slid off the sides of the cake…taking the frosting and pecans down with it! Ugh!

I decided to stop, put the cake in the fridge overnight and then try to touch up the cake with the remainder of the frosting as best as I could before heading to the party.
If you are a pro at working with caramel sauce then I suppose you should include it. But I only recommend adding the caramel drizzle on the bottom layer.
I was really upset that my cake did not look as the picture in Bon Appétit did…but Laura kindly told me that the pictures in the magazine are just painted on anyway..ha ..not so sure about that but thank you for making me feel better about myself and the finished product!

Although the cake was not the most attractive thing to look at the end product-the taste- turned out great..even without the use of maple sugar!
Below are the ingredients and directions given by Bon Appétit! Good luck & enjoy!
10 Servings PREP: 1 hour
TOTAL: 3 hours (includes cooling time)
Ingredients:
Maple- Coated Pecans
3/4 cup pecan halves, toasted
1/4 cup pure maple syrup (preferably Grade B) or Grade A my store did not have B
Coarse kosher salt
Cake:
2 1/2 cups all purpose flour
1 1/2 teaspoons Chinese five-spice powder
1 teaspoon baking soda
1/2 teaspoon coarse kosher salt
1/3 cup chopped crystallized ginger (1 1/2 to 2 ounces)
1 cup maple sugar (I used 1/2 reg. sugar, 1/2 brown sugar, and a dash of maple syrup!)
3/4 cup (1 1/2 sticks) unsalted butter, room temperature
2 large eggs
2/3 cup mild-flavored (light) molasses
3/4 cup hot water
Frosting:
1 1/3 cups chilled crème fraîche
1/3 cups chilled heavy whipping cream
1/2 cup maple sugar
6 tablespoons powdered sugar
Salted Maple-Caramel Sauce (click for recipe)


Preparation:
Maple-Coated Pecans:
Place large piece of foil on work surface. Combine nuts and maple syrup in heavy medium skillet (do not use nonstick) over medium-high heat and bring to boil, tossing to coat. Cook until syrup is dark amber and almost cooked away and thickly coats nuts, tossing often, 3 to 3 1/2 minutes. Scrape nuts onto foil. Working quickly with 2 forks, separate nuts. Sprinkle with coarse salt. Cool until coating is crisp and hard, about 1 hour. DO AHEAD Pecans can be made 1 day ahead. Store airtight at room temperature.


Cake:
Preheat oven to 350°F. Butter and flour two 9-inch-diameter cake pans with 1 1/2-inch-high sides. Combine first 4 ingredients in processor; add ginger. Blend until ginger is finely ground, about 1 minute. Using mixer, beat maple sugar and butter in large bowl until fluffy. Beat in eggs 1 at a time (batter may look curdled). Stir 3/4 cup hot water and molasses in small bowl. Beat dry ingredients into butter mixture in 4 additions alternately with molasses mixture in 3 additions.
Divide batter between prepared pans (about 2 1/2 cups each). Bake until tester inserted into center comes out clean, 30 to 32 minutes. Cool cakes in pans on racks


Frosting:
Combine crème fraîche, cream, and both sugars in large bowl. Using electric mixer, beat until very thick and stiff. 
Cut around pan sides to loosen cake layers; turn out onto racks. Place 1 cake layer on platter. Spread with 1 1/3 cups frosting. Drizzle with 3 tablespoons caramel sauce. Top with second cake layer. Spread remaining frosting smoothly over top and sides of cake. Drizzle top of cake with 3 tablespoons sauce. Cover with cake dome; chill at least 1 hour. DO AHEAD Can be made 1 day ahead; keep chilled. Let stand at room temperature 30 minutes before continuing.
Cut pecans into pieces or leave whole. Press pecans into frosting on sides of cake. Cut cake into wedges. Spoon sauce over.


Monday, November 8, 2010

11/10 : National Vanilla Cupcake Day- Vanilla Chai Tea Cupcakes


While perusing fellow foodie blogs, searching for my next cupcake inspiration…my eyes popped out like a cartoon character when I read the subject line: Vanilla Chai Tea Cupcakes!
It was love at first site! I knew right then and there that these cakes would be my next project! I love chai tea! I drink a chai tea with a splash of vanilla almost everyday.
I noticed that the original recipe did not include cake flour, as my favorite recipe for vanilla cupcakes, Billy’s vanilla cupcakes do. I feel as though cake flour makes the cupcake less dense so I wanted to incorporate the ingredient into the recipe.

I sort of made up my own recipe for the chai cupcakes, using suggested measurements and ingredients from both Bakingdom and Billy’s Vanilla.
Feel free to check out the links to each recipe’s site; however the recipe I created for these delightful cakes is below:
Oh and guess what! My aunt pat sent me an early Christmas present- a kitchen aid mixer!!!…makes baking so much cleaner, faster, and simpler! THANK YOU PAT!

Vanilla Chai Cupcakes — Makes 24 cupcakes
Cupcakes:
1 ¼ cups all purpose unbleached flour
1 ¾ cups cake flour
1 tsp. baking soda
1 tbl baking powder
¾ tsp. salt
2 tbl. cinnamon
1 tsp. ginger
1 tsp. nutmeg
2 cups sugar
1 cup butter
4 eggs
½ cup apple sauce
1 cup whole milk          
4 bags chai tea

Frosting:
1 ½ cups butter
4- 5 cups powdered sugar
1 tbl. Vanilla
1 tbl. Cinnamon
3 tbl. whole milk or heavy whipping cream

1. Preheat oven at 350 degrees. Line muffin tin with cupcake liners.
2. In a small saucepan, heat milk until it simmers. Remove from heat and add tea bags. Let sit for 10 minutes, then remove tea bags and leave it to cool.
3. In a medium bowl, combine flour, baking soda, baking powder and spices. Set aside.
4. In a large bowl, cream butter and sugar together. Add eggs one at a time, then add apple sauce until well incorporated.
5. Add 1/3 of flour mixture, mixing well. Then add 1/2 of chai tea milk. Add additional 1/3 flour mixture, then remainder of the milk, finishing with the rest of the flour, mixing well after adding each ingredient. Do not over mix.
6. Fill each cupcake liner 2/3 full. Bake for 18 minutes until a toothpick can be removed cleanly.
7. For frosting, cream butter until it is light and fluffy. Add 1 cup powdered sugar, and cream together. Beat in an additional cup of powdered sugar until incorporated, then add vanilla. Add cinnamon, then remainder of the powdered sugar. If frosting seems too thick or is not mixing, add tablespoons of milk until it is the right consistency (thick enough to stand but thin enough to mix, with everything incorporated). Pipe or spread onto cupcakes and enjoy!

Wednesday, November 3, 2010

Musically Savage Moustache-Cookie & Cream Cake!

What a perfect cake to start off the month of November!...(by the way…can you believe it’s already November!? Yikes!)
November to some people is also known as: Movember.
This great cause was brought to my attention by my dear friend James.

Via: http://us.movember.com/  :
“The 'Mo', slang for moustache, and November come together each year for Movember. 
Each Movember we challenge men to change their appearance and the face of men's health by growing a moustache. The moustache is our ribbon, the means by which we raise awareness and funds for cancers that affect men. Much like the commitment to run or walk for charity, our commitment is to grow a moustache for 30 days. Funds raised benefit the Prostate Cancer Foundation and LIVESTRONG.”
So please log on to the Movember website- read up, educate yourself, participate, and donate!
The sole purpose of decorating this cake as such however was to celebrate my other bestie Cameron’s birthday.
Cameron created a group of DJ’s called the Music Savages. The mustache to them represents the dirty audacious man inside every man that comes out late at night.
It is also the symbol of their group-they have a mustache madness competition which takes place in March, t-shirts, flags, and all kinds of stuff.
Visit their pleasurable site, listen and enjoy! (MusicSavages)

We had a birthday dinner at Baby Blues- and let me tell you…that is like a thanksgiving dinner twice over! I really didn’t think anyone would have room for cake…but whoa…did that cake get dominated!
I have never received so many compliments on a cake too! : )
This is actually a cupcake recipe…but I wanted to incorporate a huge mustache so I made it as a cake instead!
Whether you opt for a cupcake or cake-this should be your next go to recipe for a cake! It is amazing, and a definite repeat!
You will also see an image below of what it would look like as a cupcake… (What? I had to bake a sample to make sure if was okay for everyone to eat!) 


Yield: 24 cupcakes or 2 layered cake
Ingredients:
For the cupcakes or cake:
24 Oreo halves, with cream filling attached-needed for cupcakes only-base
2¼ cups all-purpose flour
1 tsp. baking powder
½ tsp. salt
8 tbsp. unsalted butter, at room temperature
1 2/3 cup sugar
3 large egg whites, at room temperature
2 tsp. vanilla extract
1 cup milk
20 Oreo cookies, coarsely chopped (I quarter them)

For the frosting:
8 oz. cream cheese, at room temperature
6 tbsp. unsalted butter, at room temperature
1 tbsp. vanilla extract
4 cups confectioners’ sugar, sifted
2 tbsp. heavy cream
For garnish:
Oreo cookie crumbs
24 Oreo cookie halves


Directions:
Preheat the oven to 350˚ F.  
For cupcakes: Line the wells of two cupcake pans with 24 paper liners.  Place an Oreo halve in the bottom of each liner, cream side up.  

In a medium bowl, combine the flour, baking powder and salt; stir together with a fork to blend and set aside.  In the bowl of an electric mixer, combine the butter and sugar and beat together on medium-high speed until light and fluffy, about 2 minutes.  Blend in the egg whites one at a time, beating well after each addition.  Blend in the vanilla extract.  With the mixer on low speed, beat in half of the dry ingredients just until incorporated.  Add the milk and beat just until combined, then mix in the remaining dry ingredients.  Gently fold in the chopped Oreos with a rubber spatula until evenly incorporated, being careful not to over-mix.

Evenly divide the batter between the prepared cupcake liners.--Or between two greased cake pans. Bake for 15-20 minutes, rotating the pans halfway through baking, until a toothpick inserted in the center comes out clean. Allow to cool in the pans 5-10 minutes, and then transfer to a wire rack to cool completely.
To make the frosting, combine the cream cheese and butter in the bowl of an electric mixer and beat on medium-high speed until smooth, about 1 minute.  Blend in the vanilla extract.  Beat in the confectioners’ sugar until incorporated and smooth, 1-2 minutes.  Add the heavy cream to the bowl and beat on medium-low speed just until incorporated, then increase the speed to medium-high and whip for 4 minutes until light and fluffy, scraping down the sides of the bowl as needed.

Frost the cooled cupcakes as desired.  Sprinkle with Oreo crumbs and garnish with Oreo halves.
For the cake, I iced the bottom layer, then sprinkled chopped up Oreo on top. Next I placed the second layer on top, frosted, and then garnished with the Oreo mustache!
To make mustache: finely crush/chop Oreo’s. Find a blown up image of a mustache, cut out the mustache, and use paper as stencil!