Wednesday, January 19, 2011

Christmas CraCk

On the rough streets of a little town called Ponte Vedra Beach this treat is known as cRaCK!
However the proper name of these addicting little bites is chocolate brittle.

Every Christmas my mother bakes these as if the kitchen is an assembly line.
Perhaps, it is just years of experience, but she whips these suckers out so fast, and in copious amounts.
Every holiday season, she breaks them up, and packages them in a decorative bag or container and hands them out as gifts to her clients, friends, and family.
It seems as though once Nov. 1st  hits, these recipients are already calling and emailing- inquiring as to if and when she will be making her crack this year!?

This crispy piece of chocolate is good to make anytime, not just for the holidays! Since the brittle is kept in the fridge, it last for a very long time..unless eaten up! 

Ingredients:
Graham crackers- about 3/4 of a box
1 cup butter
1 cup brown sugar
Chocolate chips- 1 12oz bag and maybe a little more
Chopped walnuts - a cup or so


Directions:
Preheat oven to 425. Line a cookie sheet with foil.
Line the foil with graham crackers. You may have to cut some to fit the pan.
 In a small saucepan over medium to high heat, melt the butter ad sugar together. stir constantly and let it come to a boil. Boil about 3 minutes and remove from heat.
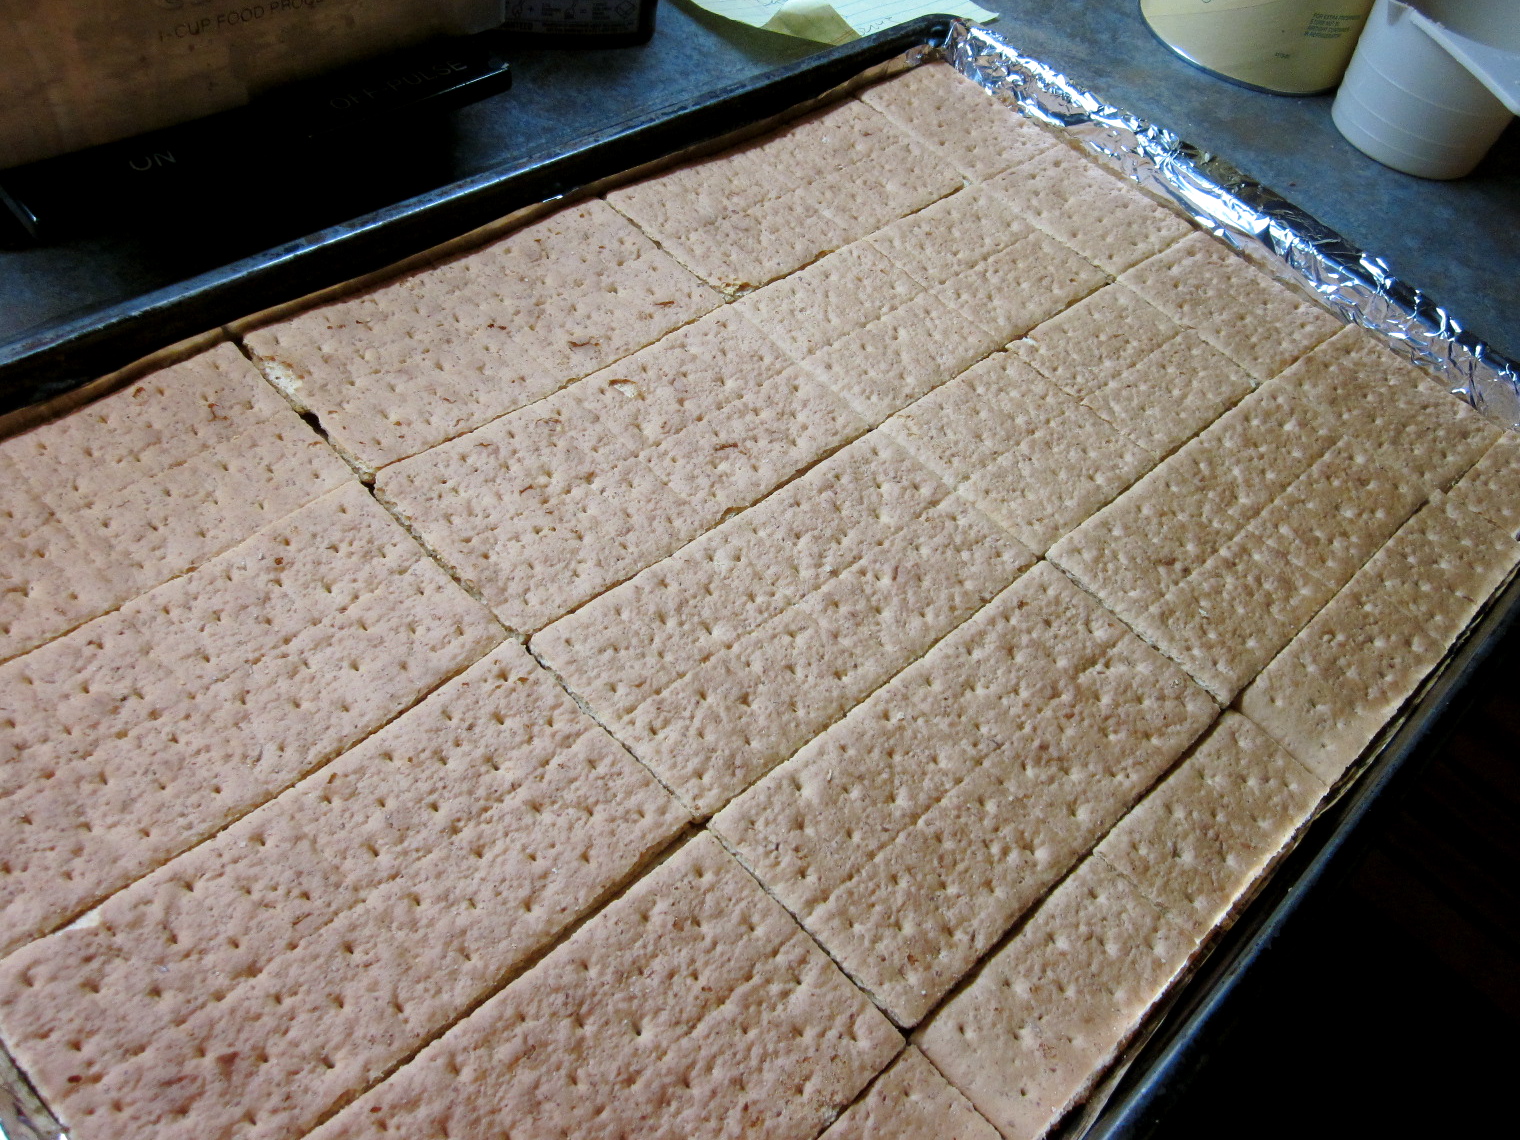
Pour immediately over the graham crackers and put in oven for 5 minutes. Remove from oven and sprinkle chocolate chips over the whole thing. Let the chips melt for a minute and spread evenly.
Sprinkle chopped nuts over all. Gently press nuts into chocolate..be careful..the chocolate is hot!
Put in freezer or refrigerator until firm. When firm, break into irregular pieces. Keep in refrigerator until ready to serve!

Keep in air tight Ziploc bag in fridge.


Thursday, January 13, 2011

Cranberry Cake

Hello! Here is a quick entry before I take off for the weekend!

This is made basically the same way as my very first entry: Green Apple Cake.

My mother writes:

All I did was use the Green Apple Cake recipe and substitute cranberries - I also had one stray apple, so I chopped that up to go into it too.

The recipe calls for 3 cups of chopped apples, so I ended up with 1 cup of apple, then I took 1 cup of cranberries and chopped them in the food processor, but I don't think that was necessary and probably wouldn't do it again - then I added another cup or so of cranberries - I think when I measured the cranberries out of the little bag they came in, I ended up with about 20 cranberries left over, so I just threw them in.  And then I added about a cup of chopped walnuts.

When the cake was done, I took about 1/4 cup of rum, 1/4 cup of cranberry juice and 1/4 cup of orange juice and mixed them and poured it over the cake while the cake was still warm and still in the tube pan.  I thought it made the cake a little soggy, but everybody seemed to like it.  Maybe next time I would use less juice, but keep the rum.  And I might turn the cake out and pour it over the bottom, so the top would stay crusty.

**I agree with my mom, this cake was super rummy, and a bit soggy..but if you are looking for a cake with a kick, by all means, add this amount of rum juice to top it off!* Otherwise it is delicious without!!**


But it was good anyway!  My mother had a recipe for cranberry cake that she made every Christmas that was much more complicated - it called for grated orange rind, chopped dates - both time consuming activities - I thought this turned out just as good, with less work!

Ingredients:
2 1/2 cups flour
2 tsp baking powder
1 tsp baking soda
1 tsp salt
2 eggs
2 cups sugar
1 cup corn oil
1 tsp vanilla
1 cup chopped walnuts

Preheat oven to 350.
Mix Dry ingredients together. In a large mixing bowl, beat eggs, add sugar, oil, and vanilla. Mix well. Add dry ingredients until blended.
Batter will be pretty thick at this point.    
Fold in cranberries, apple, & walnuts. 
Pour into well greased and floured tube pan. Bake for 45- 60 minutes. Allow to cool in pan.

That's it! Enjoy your weekend! XO


Thursday, January 6, 2011

Bridal Shower Cupcakes pt. 2

As you read in part 1 of bridal cupcakes- champagne cupcakes…I made two other flavors for the shower as well.


These two took a bit longer than expected. When starting this baking marathon, I opted to first bake Billy’s vanilla cupcakes, since I have baked them so many times before.
You know to start this "bake-athon" off on the right foot...easy breezy!
Well… that is not what happened.
We still cannot figure out why this happened…I followed the recipe as I always do, plus I was at home using a much nicer oven, than my tiny apartment oven.
But when the timer went DING! I opened the oven and my cupcakes had exploded everywhere!

It is unfortunate that the cupcakes decided to do this when I was in one of my “GO, GO, GO moods”, because I became very upset and distraught with them!..them being the cupcakes!

My mother even had to separate me from my boyfriend and father as I was getting very flustered with the two of them, shouting "Stop it! Stop it! Go away!" as they hovered over me eating the remnants of the exploded cupcakes, and telling me how good they still tasted. Ugh! That is not what I wanted to hear. (this is the G rated version)

This is when I decided to take a break from baking the cupcakes and switch to whipping up the 3 frosting's.

Again, I started with Billy’s Vanilla Buttercream, and as usual it tasted decadent helping cheer me up quite a bit!
Then I began to make a dark chocolate frosting. This inevitably brought me back down to a baking confidence of zero!
The dark chocolate frosting was thin and drippy, more like a ganache for dipping!
Therefore I opened the bottle of champagne to make the sweet cream frosting, but poured myself a tall glass before continuing.
As expected the bubbly helped lighten my mood, and the best icing in the world was created!

I then decided to go back to baking up the cupcakes; beginning this time with the champagne, and next the devils food.
Next I went and searched for Billy’s chocolate buttercream frosting recipe, since my dark chocolate recipe turned out to be worthless!

8 hrs later I was forced to take a break and to make the vanilla cupcakes the morning of the party.

For some reason, the second time around, the vanilla cupcakes turned out as I had originally anticipated.
As I told you in the last entry I placed all the frosting's in the fridge the night before, and took them out to defrost the morning of.
As with the champagne frosting my mother and I attempted to re-whip the other two frosting's.


I attempted to use my frosting tips for the vanilla frosting, but after we had re-whipped them the frosting became too soft and started to melt, as you can see.
By the time I was done decorating the champagne, and the chocolate cupcakes with vanilla frosting, I had lost my patience and decided just to use my offset spatula to decorate the vanilla cupcakes with the chocolate frosting. Plus the chocolate frosting became too thick after it was whipped up and could not go down the pastry bag. 

Sigh … soooo after 90 cupcakes and lets say 10-12hrs later..was it worth it? Yes! I was so happy to be apart of adding a special touch to the shower for one of my best friends. And the only reason it took so long is because, well...if you're going to do something, you must do it right!

Since this entry is so long, simply click on the highlighted links above for the recipes! Ciao!
<----bridesmaids & bride!!

Tuesday, January 4, 2011

Champagne Cupcakes!!!

What a better way to kick off the new year than with a recipe for champagne cupcakes!
Over the holiday we had a “cupcakes and cocktail” themed bridal shower for our newly engaged friend Meredith. 

I made 3 types of cupcakes, two of which will be shared in pt. 2 of this entry; however the champagne cupcakes were the party favorite.

I did not run into any problems with this batch of cupcakes. As you can see in the picture below they baked perfectly! 

In order to be prepared and ahead of the game I made the frosting the night before, and kept it sealed in the fridge overnight.
Unfortunately the icing was not defrosting as I had hoped the next morning, so I had to re-whip the icing in my mother’s kitchen aid mixer.
As you can see the icing looks a bit frothy/thick due to re-whipping….but this did not interfere with its perfectly sweet taste. 

I wish you could have seen the reactions on some of the guests faces when biting into this cupcake…
The champagne is featured delightfully, but not overwhelmingly.  The texture is nice and light.  And although the frosting may not fit in your New Year’s resolutions, it’s an unbelievably delicious way to begin the year!
These are definitely my best so far, and will be a go-to for any grand celebration to come!

Champagne Cupcakes with Sweet Champagne Buttercream Frosting Recipe
(Cupcake recipe adapted from AllRecipes

Champagne Cupcake Ingredients:
2 ¾ cups all-purpose flour
3 tsp. baking powder
1 tsp. salt
2/3 cup butter
1 ½ cups white sugar
¾ cup champagne (the sweeter the better)
6 egg whites

Sweet Champagne Buttercream Frosting:
3 ¼ cup powdered sugar
1 cup butter at room temperature
1 teaspoon of vanilla
3 tablespoons of champagne, at room temperature

To Make Cupcakes:
Preheat oven to 350 degrees F (175 degrees C).  Prepare a cupcake pan with liners.  (This recipe yielded about 24 for me.)
In a large bowl, cream together butter and sugar until very light and fluffy. Sift flour, baking powder, and salt together, and then blend into creamed mixture alternately with champagne.
In another large clean bowl, beat egg whites until stiff peaks form. Fold 1/3 of the whites into batter to lighten it, then fold in remaining egg whites.  Fill the cupcake liners about 2/3 full.
Bake at 350 degrees F (175 degrees C) for 20 minutes, or until a toothpick inserted into the cake comes out clean.

To Make the Frosting:
With an electric mixer, beat together sugar and butter. Mix on low until well blended, and then on medium for another two minutes.  Add vanilla and champagne, beating on medium for another minute.
(**I had to nearly double this recipe to have enough to frost all of the cupcakes as pictured above.  If you’re doing a “flatter” frosting style, this recipe should be enough to cover all of the cupcakes!**)


Wednesday, December 29, 2010

Happy Holidays!!!

Hello all! I apologize if it seems that I have been neglecting you and my dedication to sweets. 
Not to worry though.. I have just been busy traveling home to visit family and friends, to celebrate, bake, and eat!! Which I am sure all of you are doing as well!
Anyway I just thought I would drop you a note, to say hello! I hope everyone is having a happy and safe holiday season.
Here is a sneak peak of what recipes to expect...next year!
Happy New Year and cheers!


cookies:


Cake:


TINA's cookie balls

and cupcakes oh my!

Monday, December 13, 2010

National Cupcake Day 12/15: Gingerbread Cupcakes

Since national cupcake day is smack dab in the middle of the holidays..what a better flavor cupcake to have than gingerbread?
This is a classic recipe gone cupcake!
I used my great grandmother’s gingerbread recipe to make these cupcakes.
The cupcakes turned out just fine..however the gingerbread did not taste how I made it the last time for a dinner party..which was exquisite!
Maybe this recipe is not meant to be doubled (which I did in order to make 24 cupcakes) or perhaps I tampered with it a bit!
Bad Marge! Bad! The recipe requires 2 cups flour..but since I doubled the recipe, I thought I’d experiment by incorporating 3 cups regular flour, 1 cup cake flour.
I believe the cake flour had a lot to do with the bread tasting a bit different…and a bit dense.
Other than the taste being a bit off than I remembered..they were great!
There are tons of gingerbread cupcake recipes out there..but for this special occasion I wanted to use a family recipe!
I absolutely recommend baking this gingerbread for the holidays. (don’t steer away from the recipe like I did for cupcakes) Use the exact amount of ingredients as directed!
My Aunt Kathleen would make this cake, cut it while it was still hot, split the piece and butter it. Yum!
I like my mother's description of her grandmothers gingerbread: "It's a cozy dessert!"
This bread is also yummy with whipped cream, a lemon sauce, or ice cream; also another great breakfast substitute!
Ingredients:
1 Tbl butter
1 cup sugar
1/2 cup molasses (Grandma's unsulphured)
2 eggs
2 tsp ginger
2 tsp cinnamon
1 tsp vanilla
2 cups flour
1 cup boiling water with 1 tsp baking soda dissolved in it
Preheat oven to 350. Mix all ingredients together at once except the water. Make sure the baking soda has dissolved in the water and add. Mix well. Pour into 9x13 greased and floured pan. Bake for about 20 minutes, or until a tester comes out clean. Serve immediately or let cool.
For the butter glaze icing I used for the cupcakes visit this Martha Stewart link!

Tuesday, December 7, 2010

LIGHT!!! Marbled Chocolate Banana Bread

Here is an option to start off the holiday on a healthy note!
Don’t let the whole wheat flour, fat-free yogurt, and egg substitute trick you.
This bread is moist, dense, and sweet enough to feel like a real indulgence. And don’t we all need that?

I am a nut lover so I did miss the crunch of walnuts as I bit into the bread; but if you are not a nut lover this is a perfect treat for you!

Marbled-Chocolate Banana Bread
1 cup all-purpose flour
1 cup whole wheat pastry flour (or all-purpose flour)
3/4 tsp baking soda
1/2 tsp salt
1/8 tsp ground nutmeg
3 oz. bittersweet or semisweet chocolate, chopped
1 cup sugar
1/4 cup unsalted butter, softened
1 1/2 cups mashed banana (about 3)
1/2 cup egg substitute
1/3 cup plain fat-free yogurt

1. Preheat oven to 350F. In a medium bowl whisk the flours, baking soda, salt and nutmeg until blended.
2. Place the chocolate in a medium microwave-safe bowl, and microwave on HIGH 1 minute or until almost melted, stirring until smooth. Cool slightly.
3. Place the sugar and butter in a large bowl; beat with a mixer at medium speed until well blended (about 1 minute.) Add banana and egg substitute, and yogurt, beating until blended. Add the flour mixture with a wooden spoon, stirring just until blended.
4. Add 1 cup batter to chocolate, stirring until well combined. Spoon chocolate batter alternately with plain batter into an 8 1/2 by 4 1/2 inch loaf pan coated with nonstick cooking spray. Swirl batters together using a knife.
5. Bake 40 minutes to an 1 hour or until wooden pick inserted in center comes out clean. Cool 10 minutes in pan on a wire rack; remove from pan. Cool completely on wire rack. Makes 1 loaf, 16 slices.

And because this is a “light” version of banana bread, here's the nutritional info:
Per 1 slice - Calories 185; Fat 5.4g; Protein 3.4g; Cholesterol 8.2mg; Carbohydrate 32g


Recipe from Enlightened Chocolate by Camilla Saulsbury